
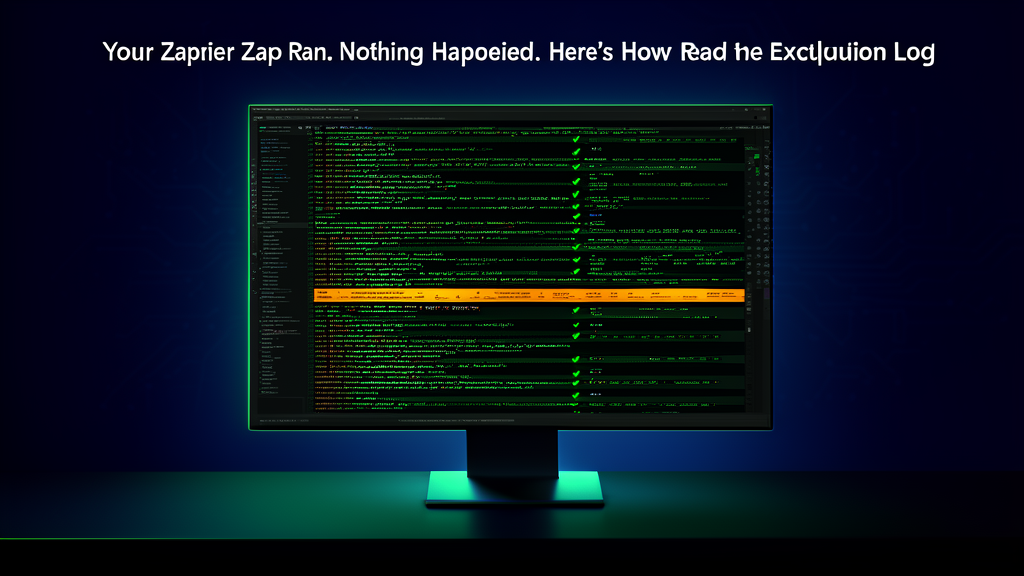
You click into Task History, scroll past forty-seven green checkmarks, and open the last row. The status says Success. The Google Sheet stays empty. That is the exact moment most operators open a support ticket, blame the integration, or start rebuilding from scratch. The real problem was a single unchecked field mapping, visible in plain text inside the Zapier execution log, if you know where to look.
Reading the Zapier execution log is not difficult. The interface just trains you to trust the color coding, which leads to three very specific blind spots. This guide walks through the log field by field, names the places it quietly misleads you, and gives you a repeatable debugging method you can finish in under ten minutes.
What the Execution Log Actually Is (and Where to Find It)
Every time a Zap triggers, Zapier creates a task record. That record lives in Task History, which sits under the History tab for any individual Zap, or at the account level under the main History navigation item. The two views show the same data. The Zap-level view just pre-filters to that specific workflow.
Each row in Task History represents one run of your Zap. Click any row and you get the execution log: a timestamped, step-by-step breakdown of what happened when that trigger fired. This is the actual witness to your automation’s behavior. Everything else, the Zap editor, the test panel, your intuition about what should have happened, is secondary.
Zapier distinguishes between three status types you will see on task rows:
- Success (green): Zapier completed every step without a hard error.
- Error (red): At least one step threw an exception. An API rejected the request, a required field was missing, or authentication failed.
- Stopped (grey or yellow): The Zap ran but a filter or path condition halted execution before it finished all steps.
Here is the problem with trusting that color coding. A green Success status means Zapier completed every step. It does not mean your automation produced the result you wanted. Those are not the same thing. A Zap that fires, maps a blank field into your database, and writes an empty row to your Sheet reports as a success. The task completed. The outcome was useless.
How to Read the Zapier Execution Log Step by Step
Click into any task row and you will see a vertical timeline of steps. Each step is expandable. Here is what each section contains and what you should actually look for.
The Trigger Step
The trigger step shows you the raw data that came in from the source app. Expand it and you will see every field Zapier received: names, values, data types. This is your ground truth. Before you investigate any action step, check two things here:
- Did the trigger fire on the right record? Look at the identifiers, email address, record ID, or form submission timestamp, and confirm this is the data you expected.
- Are the values populated? A trigger can fire on a record where key fields are genuinely empty in the source app. If the field your action needs is blank here, the problem is not Zapier. The upstream data is.
This single check eliminates roughly thirty percent of my Zap is not working situations. The Zap worked fine. The source record was empty or misformatted before it ever reached the workflow.
Filter and Path Steps
If your Zap includes a Filter step and a task shows as Stopped, the filter step log entry will tell you exactly which condition evaluated to false. It shows you the field value it tested and the rule it tested against. Nine times out of ten, a stopped Zap is a case sensitivity mismatch, a trailing space in a field value, or a number formatted as text.
The filter log is unusually readable. Zapier writes it out in plain English. It says something like Status contains active, the value was Active. Zap stopped. That is the whole story. Most people do not expand the filter step because they assume a stopped Zap means the filter worked as intended. Sometimes it means the data is wrong.
Action Steps
Each action step has two sub-panels: Input and Output. This is the most important distinction in the entire log, and it is the one most people skip.
The Input panel shows what Zapier sent to the action: the field values it assembled from prior steps before making the API call. The Output panel shows what the action’s API returned after the call completed. Reading only the Output is a mistake. If the Output shows a success response but your data looks wrong downstream, go back to Input. That is where you will find the blank field, the wrong ID, or the field that pulled from step one instead of step three.
Consider a specific example. You are mapping a contact’s email from a form submission into HubSpot. The Output says the HubSpot contact was created successfully. When you check HubSpot, the email field is blank. Open the Input panel for that action step. You will almost certainly see email: (empty) because the field mapping in the Zap editor was pointed at a field that exists in your test data but not in the live submission format. Zapier sent an empty value, HubSpot accepted it, and everything showed green.
That is the execution log doing exactly its job. You just have to look at both panels.
The Green Success Trap
There is a specific failure mode worth naming explicitly, because it is responsible for more automation confusion than any API outage or bad credential. Call it the silent success: a Zap that runs cleanly, reports green, and produces nothing useful.
Silent successes happen in three main patterns:
- Empty field mapping: A mapped field is blank in the live data. Zapier sends the empty value. The receiving app accepts it. No error fires.
- Wrong record written: The Zap creates or updates the right type of record, but uses a static test value, an ID or email you typed during setup, instead of the dynamic value from the trigger. This is especially common with find or create actions. The lookup step finds your test record, not the live one.
- Action succeeded on a duplicate: The Zap ran twice on the same trigger, a webhook fired twice or a Zap was accidentally re-enabled after testing, and the second run hit a record that already existed. The success is real. The outcome is a duplicate row you did not need.
In all three cases, the Input panel of the action step is where the evidence lives. Make it a habit to check Input, not just Output, any time your automation produces an unexpected result even without a red error.
Using the Replay Button Without Making Things Worse
Zapier lets you replay any failed or stopped task directly from the execution log. That button is genuinely useful. It is also easy to misuse.
Replaying a task re-runs the Zap against the exact same trigger data from the original run. It does not re-fetch live data from the source app. If you replay a task because you changed something in a connected Google Sheet, the replayed run uses the row data from the original trigger, not the current Sheet state. You will just generate another failure with identical log output.
The right sequence when debugging and replaying:
- Identify the problem in the execution log, check the Input versus Output mismatch, filter mismatch, or empty field.
- Fix the root cause in the Zap editor or the source app.
- Turn the Zap off, make your edits, turn it back on.
- Replay only if the original trigger data is still valid for the fix you made. If it is not, trigger a fresh live run instead.
Replaying a task before fixing the Zap just generates another failed task with identical log output. It feels productive and accomplishes nothing. The automation error handling guide on this site covers the broader pattern of building failure recovery into workflows before a problem happens. For in-the-moment debugging, replay is your scalpel, not your first move.
Task History Limits and What You Might Be Missing
Zapier’s Task History retention depends on your plan. On the Free and Starter tiers, Zapier retains task history for a limited window, typically seven days, though plan terms vary. On Professional and higher plans, history extends to longer windows. Zapier’s official documentation on Task History has the current plan-specific retention numbers.
What this means practically: if your Zap broke on Monday and you are investigating Thursday, the log may still be there. If you are on a lower tier and investigating a week-old failure, it may be gone. This is the single best argument for adding a logging step to any business-critical Zap. A simple action that writes each run’s key fields, trigger ID, timestamp, status value, and output ID, to a Google Sheet or Airtable table creates a permanent record that survives Zapier’s retention window and is infinitely easier to search.
This pattern matters more than it sounds. A Zap that silently fails once a week at 2 AM will accumulate missing records for months before anyone notices. Your logging row catches the gap. You can build this in ten minutes using a Zap that triggers on every new record, maps the run ID, timestamp, Zap name, and success status, and appends it to a master tracking sheet. You then set a weekly review to scan for Stopped or Error statuses before they compound.
The Field-Mapping Audit: A Pre-Launch Habit That Prevents All of This
Most execution log debugging happens after something breaks. The better play is a five-minute field-mapping audit before a Zap goes live. Here is the method:
- In the Zap editor, open every action step and check each mapped field. For any field that pulls from a prior step, click the field value and confirm it is pointing at the right step and the right field name. Double-check dropdown menus, which often default to the first option in your test data.
- Run a test with live data. Zapier lets you load real records from the source app during setup. Use them. Sample data often strips formatting, drops special characters, or leaves required fields blank in ways live submissions do not.
- After the test run completes, open the execution log for that test task. Check the Input panel of every action step. Verify no field shows empty when it should not.
- Check the Output panel and confirm the returned record ID or confirmation data looks right. For a create row in Sheet action, that means the row ID should be a real number, not null. For a CRM create action, verify the contact ID matches a real record.
This takes five minutes on a simple Zap and maybe fifteen on a complex multi-step one. It is the pre-flight that prevents the forty-seven runs, empty Sheet situation from the opening of this article. For more complex multi-step workflows, the output-first design approach covered in this guide on multi-step automation logic is the structural complement. Design backward from the result, then audit forward through the log.
When the Log Doesn’t Tell You Enough
The execution log is a good witness, but it has limits. Two situations where it falls short:
Third-party API errors with vague messages. When an action step fails with an error like Bad Request or 422 Unprocessable Entity, the Output panel shows Zapier’s formatted version of the error, not the raw API response. Sometimes the detail you need is buried in a field like error_description or message inside the response body. Zapier surfaces some of this but not always all of it. If the log gives you a generic error, check the connected app’s own activity log, HubSpot’s audit log, Slack’s workspace logs, or Airtable’s revision history, to see what actually arrived.
Zaps that never triggered at all. If a record was created in your source app and no task appears in history, the Zap did not fire. The problem is upstream of the log entirely. Check that the Zap is turned on, which is obvious but worth saying, that the trigger app’s connection is still authenticated, and that the trigger conditions, the app’s own filters, webhook payload format, or polling interval, are set up correctly. A Zap with no task in history is not a failed Zap. It is a Zap that was never called.
Frequently Asked Questions
Why does my Zap show Success but nothing happened in the destination app?
A green success status means every step completed without a hard error. It does not mean the data was correct. Open the task in your execution log and check the Input panel of each action step. Look for empty fields or wrong values. The action ran, it just ran with bad data.
How long does Zapier keep execution log history?
It depends on your plan. Free and Starter plans typically retain seven days of task history. Professional and Team plans extend that window significantly. Check Zapier’s current plan page for exact numbers, since retention limits are updated periodically.
Can I replay a successful task to re-run the Zap?
Yes, but the replayed run uses the original trigger data, not current data from your source app. Use replay when the trigger data is still valid and you have fixed the Zap itself. Trigger a fresh live run when the source data has changed since the original event.
What is the difference between a Stopped task and an Error task?
A Stopped task means a Filter or Path condition evaluated to false, so the Zap intentionally halted. An Error task means a step tried to execute and failed, usually due to an API rejection, authentication problem, or missing required field. Stopped is expected behavior. Error usually requires a fix.
How do I find a specific failed task if I have thousands of runs?
In Task History, use the status filter, Error, Stopped, Success, and the date range picker to narrow the window. You can also search by the Zap name at the account level. For critical workflows, the permanent logging setup described above, writing each run to a Sheet, makes historical searches much faster and survives plan-tier retention limits.
The Log Is Already There. Use It.
Every Zap run is already being recorded. Zapier writes the full input, output, and status of every step by default, on every plan, for every workflow. Most users never open it unless something visibly breaks. The people who check it proactively are the ones who catch silent failures before they compound into weeks of missing data.
The execution log does not require any setup, any add-ons, or any code. It requires knowing which panels to open and what distinction to make between Input and Output. The green checkmark is not the finish line. The Input panel is where the actual answer lives. Treat it like one, and your automations stop being a mystery.